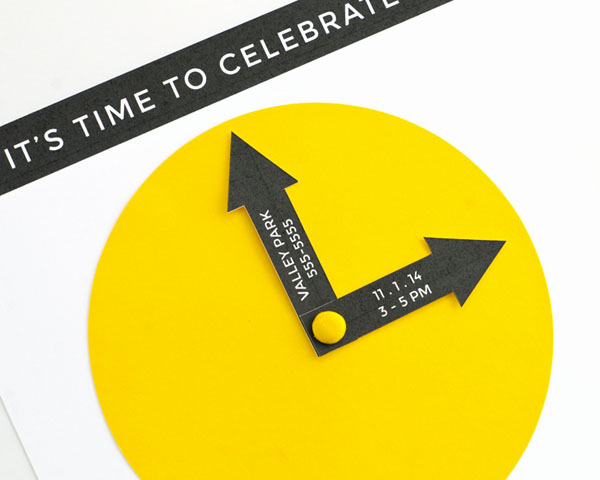
I love a good pun and this Party Clock Invitation DIY will let the recipient know it is time for a fun celebration. You can customize the text on the invitation to reflect the type of party you are throwing, whether it is a birthday party, housewarming party, or baby shower. Try cutting a circle from patterned paper if you want a bit more pattern and color on your invitation. If there are important details that will not fit on the front of the invitation, print it on the back of the invitation.


Materials: Party Clock Invitation printable, white cardstock


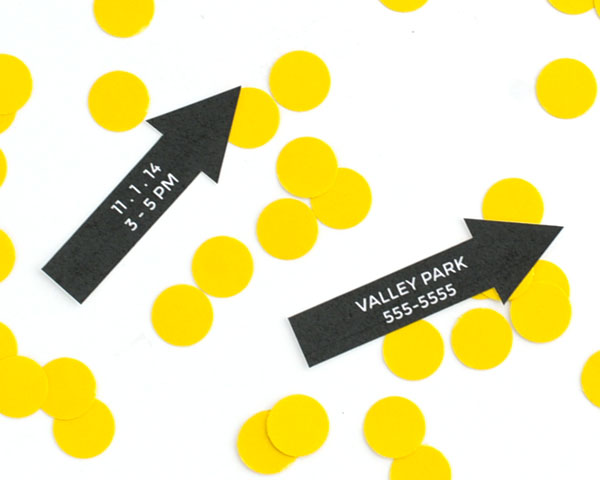
Step 1: Open the Party Clock Invitation printable in Adobe Photoshop and add text to the top and bottom borders and arrows or write on the invitation using a white gel pen. Print the Party Clock Invitation printable on an 8.5 x 11 piece of white card stock. Use X-acto knife to cut out the party invitation and arrows, cutting inside the black lines. Print the circle template onto colored card stock and cut out the circle. (You can also use a circle cutter to cut out a 4.5 inch circle.)
Step 2: Use a pencil to mark the center of the circle and use screw punch to make a hole. Use screw punch to make a hole towards the end of the arrows.
Step 3: Secure the arrows to the circle using a brad. Glue the circle to the center of the invitation.